- HubPages»
- Food and Cooking»
- Cooking Ingredients»
- Fruit Ingredients
Plant a Pumpkin Seed, Grow Your Own Pumpkin Pies

Thanksgiving is a memorable time for most families, and one of the highlights of that Thanksgiving dinner is dessert in the form of pumpkin pie. Sure, it's easy to buy the ingredients, but imagine the pride you would be able to show if you were able to say that you not only made the pumpkin pie from scratch but that you also grew the pumpkin from which that pumpkin pie was grown.
Growing pumpkins is not a difficult task. The main difficulty with growing pumpkins is the pumpkin vines seem to take over the yard, but as you will see, ways exist to avoid this problem.
At a Glance: Growing Pumpkins
Plant pumpkins after all danger of frost have passed.
Planting depth:1-1 1/2 inches deep
Planting distance from other pumpkin plants: At least 4 feet apart
Germination time: 7-10 days
Time until the harvest: 100-120 days
Pumpkins like to roam so plant them where they can grow around other vegetables or use bush-type pumpkin seeds.
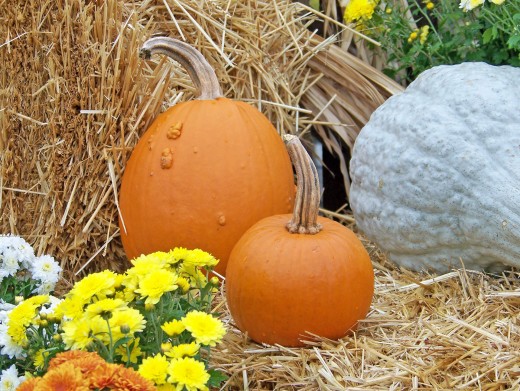
Best Pumpkins for Pie
For the best pumpkin pie, be sure to plant pie pumpkin seeds rather than the jack-o-lantern type of pumpkin. If you are considering eating pumpkin seeds, consider using a hull-less variety.
Wait until all danger of frost has passed before planting pumpkins. Plant pumpkins in hills in locations where they will have the ability to sprawl out around the garden. Pumpkins and corn planted together are mutually beneficial. Do not plant pumpkins near potatoes. Do not plant near other winter squash if you intend to save seeds as they will cross-pollinate with one another and the next generation of seeds will not be true to the original.
To plant pumpkins, loosen the soil where you intend to plant the pumpkin seeds. Ensure that all weeds have been eliminated from the area. Remove a shovel full of soil and put it in the compost pile. Replace the soil you removed with an equal amount of well-aged manure or finished compost. Water well. Plant six seeds into each hill about two inches apart in a circle. Cover with a half inch of compost, Firm the compost around the seeds, sprinkle kelp powder around the surface of the soil, and water the planted area.
Feeding the Pumpkin Vine
Lightly water the soil to keep seeds moist until pumpkin seedlings emerge. Thin seedlings to the two best plants. Once germinated, ensure that pumpkin plants receive at least one inch of water per week. Keep the area where pumpkins are growing weeded. Before pumpkins start to set out runners, lay down mulch to conserve water and keep down weeds.
At about six weeks, the plants bloom with male blossoms. Male blossoms do not set pumpkins, but about a week later, the females will begin to bloom and pumpkin fruit will begin to set on the vines. Place a piece of cardboard under each fruit to protect it from ground insect damage.
If signs of leaf insect damage are present, dust with wood ashes or Diatomaceous earth (DE). If you find tunnels in the stems of your pumpkin plants and yellow sawdust-like piles near a hole in the stem, cut the stem with a sharp knife, remove the larvae, mound up soil over the cut stem, and water well.
Pumpkins will be ripe after the color has changed from green to orange and the skin has toughened. Bring in pumpkins before the first frost in the autumn.
Harvesting and Storing Pumpkins
Harvest the pumpkins before the first frost. If pumpkins are not yet ripe, covering plants with blankets or tarps overnight can protect the pumpkins from a light frost. Harvest during dry weather. Use a sharp knife to cut the pumpkin fruit from the vine. Leave three to four inches of stem on the vine if you intend to store the pumpkin. If the pumpkin's stem breaks off accidentally, use that pumpkin immediately to prevent spoilage.
Do not wash the pumpkins that you intend to store. Store in temperatures in a location where temperatures remain between 45-50 degrees Fahrenheit (4-10 degrees Celsius) with 65-70 percent humidity. If mildew becomes a problem, wipe pumpkin fruit with a solution of 1:9 bleach: water solution and then rub with salad oil. Pumpkins will store for up to five months using this system.
Easy Pie Crust for Pumpkin Pie
Now that you have your homegrown pumpkin, it's time to start the pie, and a good homemade pumpkin pie deserves a homemade pie crust.
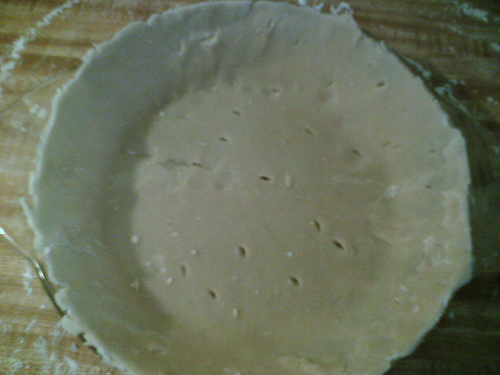
For a single-crust pie, Sift one cup of flour into a bowl and add one-half teaspoon of salt. Now, cut one-half cup of vegetable shortening into the flour and salt mixture. Mix well. Now sprinkle two tablespoons of ice-cold (the colder the better) water.
Press dough firmly into a ball. Roll out into a circle one inch larger in diameter than the pan. Fit crust dough loosely in the pan. Prevent stretching to avoid shrinking while the pie is cooking. Trim the edges of the pie and crimp the edges if desired. Your crust is now ready for the filling.
Making Your Pumpkin Pie Filing from Scratch
- Peel, cook, and mash 1 3/4 cups of cooked pumpkin,
Preheat oven to 4250F
Mix in:
- 1/2 teaspoon salt,
- 1 3/4 cups milk (canned milk, reconstituted dry milk or cream can also be used, it will just vary the baking time slightly)
- 2 large eggs (equal to 1/2 cup or four yolks)
- 2/3 cup packed brown sugar
- 2 tablespoons white granulated sugar
- 1 1/4 teaspoon cinnamon
- 1/2 teaspoon ginger
- 1/2 teaspoon nutmeg
- 1/4 teaspoon cloves
Pour mixture into pie crust, and bake for about 45-55 minutes, or until a knife inserted into pie comes out clean. The center of the pie may look soft but will set up as it cools. Serve slightly warm.
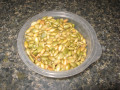
Preparing Pumpkin Seeds for Eating
The pumpkin seeds when they are removed can be used for eating as well. Wash and dry the seeds and roast in a 300-degree oven. Remove from oven and lightly salt. For a more savory flavor add garlic and or cayenne to the salt.
This content is accurate and true to the best of the author’s knowledge and is not meant to substitute for formal and individualized advice from a qualified professional.
© 2014 Cygnet Brown